This blog has moved! Please visit my new website:

The Skillery launches, and I'm teaching book arts

>> Saturday, December 3, 2011


I'm excited to announce my latest bookmaking class and the awesome organizing force behind it: The Skillery, a new project in Nashville promoting interesting classes and lectures. The Skillery community connects people looking to teach (all sorts of things) with neighbors interested in learning.

Launched on 11/11/11, The Skillery is busy promoting four classes, including mine about miniature books as holiday ornaments. And if you're reading this today, Saturday, Dec. 3, you can use a special discount code to save 20% off the workshop price (note it's only available today). Details below.

Connecting with Matt, who launched The Skillery, is just the latest great connection that has cropped up in East Nashville. He found my work online, we grabbed coffee together, and it's been an exciting time ever since, as this project gets started. I'm pretty sure that even my husband will soon be teaching classes: Most likely juggling!

Here are the details for my class, just four days away:

INTRO TO BOOK ARTS: HOLIDAY BOOK ORNAMENTS
Wednesday, Dec. 7, 7-9 p.m.
What If Studio, 69 Trimble Street, Nashville, TN 37210

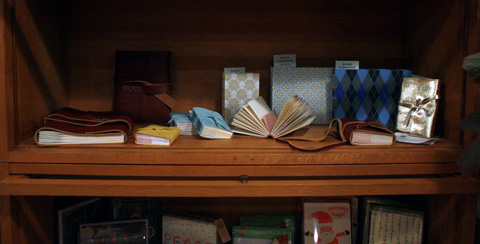
Create eye-catching miniature book Christmas ornaments in this introductory bookbinding class. We’ll make sculptural books with surprising folded structures and functional journals that can be given as gifts to friends and family. This introductory class explains the fundamentals of bookbinding, including proper techniques for folding, stitching, and gluing, as well as varied binding styles using high-quality decorative materials and traditional binding tools. All materials will be provided. This class will give you the techniques, ideas and resources to continue making handbound books.

Admission: $28, and includes all materials and supplies
One-day promo code: PORTERFLEA

The Skillery: website | twitter | facebook

Read more...

Journals for sale at Parnassus Books in Nashville

>> Monday, November 21, 2011


Last night marked the much-anticipated grand opening of Parnassus Books. The city has been buzzing about this new independent bookstore for months, and it's even been making headlines nation-wide.  (There was a front-page story about the store in the New York Times last week!) 

So far it's living up to all of the hype.  The store was packed last night, as you can see in these pictures from the grand opening event.  Plus there are more pictures on my facebook page and the Parnassus facebook page.

And I'm especially excited to announce that my handbound journals are available for sale at Parnassus. I first learned about the bookstore at Handmade & Bound, Nashville's first annual book arts festival, and was later contacted by one of the co-owners to see if I'd be interested in selling my books there.  Of course I was thrilled about this opportunity.  I think this is going to be a fantastic venue for my books, and hopefully it will introduce lots of new people to my work.


I've been busy for weeks making lots of new books for the store.  I've focused on journals and sketchbooks with leather or suede covers bound in the Italian long-stitch style.  And I've also made some books with decorative paper covers sewn using the Coptic binding.  A few of the leather books feature my own handmade paper inside.  And some books are made using suede from upcycled clothing, like a blue suede jacket or a pair of red suede pants.  

If you live in Nashville, I urge you to visit Parnassus Books and consider shopping locally for your holiday gifts.  You will not be disappointed with the curated collection of books and artwork that you'll find.  

Read more...

A handmade baby book welcomes Liam to the world

>> Tuesday, November 15, 2011


This summer, I made a baby book for a little boy named Liam.  For the covers, I used a colorful paper with animal shapes, which I think is a perfect choice for a baby book.  I paired the paper with an orange bookcloth for the spine of the book, which perfectly matches the color of the lions on the paper.  To complement the orange, I bound the book with blue thread, which also coordinates with the printing on the pages and the endsheets.  And the handmade photo corners made with and orange and yellow striped paper adds a playful touch to the pages.  

The customer came up with some great ideas for things that she wanted to include in the book, like a spot to write the story of Liam's name (what a great name, by the way!) and a page all about Thanksgiving.  I've since added both of these to my standard baby book template.  The design for my baby book continues to evolve.  I love the way that it started out last year, but with every customer I've worked with, I've come up with ideas to make the book better.  

As always, you can find more info about customized baby books in my Etsy shop.  


Read more...

Upcoming holiday shows in Tennessee

>> Thursday, November 10, 2011

I will be out and about this holiday season selling my handmade books at several art markets in Tennessee.  

Porter Crossing Arts Market
Nashville, Tennessee
Saturday, November 12 and Saturday, December 10
Noon - 9 pm

This weekend I'll once again be a part of the Porter Crossing Arts Market, as well as the second Saturday in December.  It's taking place in the cluster of buildings right around the Family Wash in East Nashville.  My work will be in the Craftville Pop-Up Shop, where you can browse and buy the work of local artists and make an autumn wreath at the DIY station in the back of the shop.  


Porter Flea holiday market
Nashville, Tennessee
Saturday, December 3
Noon - 8 pm

Tony and I stumbled across the first ever Porter Flea just days after moving to Nashville, and I was blown away by the caliber of artists that were participating and how organized the event was.  Despite the heat, it was a perfect day for the event, which also featured food trucks, music, and live screen printing demos.  I'd been looking forward to their holiday event ever since, and I'm thrilled to announce that I will be a vendor.  This time it's taking place indoors at the East Park Community Center.  You can find out more about the event on their website, and see work by the participating artists on their facebook page.  And the Movable Type Truck will be making an appearance too!


Chatty Crafty
Chattanooga, Tennessee
Saturday, December 10 and Sunday, December 11
10 am - 6 pm

Just one week after the Porter Flea, I'll be heading down to Chattanooga for the first time to sell my handmade books at Chatty Crafty.  A few of the vendors who will be at this event were also at the Athens Indie Craftstravaganzaa this spring, including Liz (my college classmate) of Liddabits Design Shop, and Jordan Grace Owens (who designed the awesome poster below).  And I'm not the only artist from East Nashville making the trip to Chattanooga.  Katie Lynne Vance, Pine Street Makery, and Simon & Ruby will be there as well (and they're all exhibiting at Porter Flea too!).

Read more...

For wedding books, colors make the difference

>> Wednesday, November 2, 2011


I always keep an eye out for great decorative and handmade papers. Collecting papers that I like, and that I look forward to sharing with my customers, is one of my favorite parts of bookmaking. I'm just about swimming in paper in my studio, from the tall rolls sprouting from baskets and bins to elaborate swatch books from paper suppliers. When the folks from Paper Mojo visited my booth at the Handmade Market, the conversation got pretty geeky about the origin countries of different papers and the techniques used to make them.
I also find myself dreaming up different color combinations, often pinning color clusters to my bulletin board or snapping pictures to remember them for future books. Yet custom orders still come through with unique pairings that I hadn't thought of before. In those moments, despite my stockpile, I search again for the perfect papers.


When Allison approached me to make a wedding guest book, she knew she wanted seafoam green, gold, and ivory. It just so happened that I had these classic colors close at hand, which excited me. As I continue building my paper collection, I think it will be more common that I have exactly what I need for custom orders. But I look forward to encountering inspirational color combinations from my customers. And, of course, I won't stop searching for great patterns, textures, and colors in papers, as well as the interesting techniques that create each sheet.

In the feedback Allison left at my shop, she called the paper colors "perfect." I like to think so too.


Read more...

A photo album personalized for a man

>> Sunday, October 30, 2011

Purple handmade book for men

I like to think of my books as being appealing to men and women alike, but for the most part, when I've worked with men on custom books, they're usually as gifts for women. I've put more attention lately to making masculine books, sometimes making leather and rustic paper choices with guys in mind.

For this book, JT knew what he wanted for himself, and a simple discussion led to his photo album. He knew right away what colors he wanted: maroon and dark purple. He also wanted black pages. I think the trio of colors work well together.

For the size, he wanted to fit 8x10 prints, which required me to make this book larger than my standard, which usually fit 4x6 and 5x7 prints. The pages in this book are 12x12, just like a standard scrapbook. After pondering various ideas for the personalized front cover, JT kept it simple, opting to use his name.

Black pages handbound book

Purple handmade book for men

Read more...

Nashville's first annual handmade book festival

>> Friday, October 21, 2011

Handmade & Bound 2011 at Watkins College in Nashville

I have only lived in Nashville for about three months, but I am already loving my new home.  One of the highlights of my time here has certainly been Handmade & Bound.  Earlier this month, Watkins College of Art, Design & Film hosted their first annual book arts and zine festival.  It is so refreshing to live in a city with such a vibrant arts community, not to mention the thriving book arts community as well. 

There were so many incredible vendors at this event, and thankfully my husband Tony was willing to man my booth throughout the day so I had a chance to explore everyone else's tables.  But I think what amazed me the most was how many people attended the festival.  The halls of Watkins College were packed throughout the day with people of all ages who came to learn more about handmade books.  The show also got some great press: check out this article from Nashville Scene and this one from The Tennessean.  

Handmade & Bound 2011 at Watkins College in Nashville

These first three photos are from The Gilded Leaf Bindery booth.  Bob Roberts specializes in restoration and fine bookbinding, and his display was quite impressive.  Even his set of tools was photo-worthy.  You can view more of Bob's work on his blog, facebook page, and etsy shop.  


The books below were made by Lesley Patterson-Marx.  She uses such interesting materials in her work, like vintage wallpaper, locally dyed fabric, old stamps and envelopes, and even harmonicas.  You can view a few more detailed photos of her work, as well as as well as quite a few other photos, in this album on my facebook page.  Lesley will also be exhibiting at Artclectic this weekend, which I am really looking forward to checking out. 


The festival also featured letterpress printing and handmade paper. Festival visitors could print their own shopping bag at the Goldsmith Press booth (left) and purchase paper made by Claudia Lee of Liberty Paper (right).  I've always loved handmade paper, but even since I started making my own paper again I've been a little obsessed.  Claudia's array of gorgeous, colorful papers were breathtaking.  I couldn't help but post even more pictures of her paper on my facebook page.  

Handmade & Bound 2011 at Watkins College in Nashville

Jennifer Knowles-McQuistion of Brown Dog Bindery demonstrated how wooden books are carved, burned, and bound.  Below she's working on a Coptic bound book with wooden covers, and she had some of her gorgeous books for sale at her booth.  Jennifer also taught a miniature pop-up book workshop during the day, which I attended.  

I also took another workshop taught by Kim Jones called Findings & Bindings, where we made a journal using a variety of found papers like maps, paper from a player piano, old encyclopedias, and junk mail envelopes.

Brown Dog Binder Jennifer McQuistion


The photos below are from my own booth.  I was displaying a variety of journals, sketchbooks, photo albums, and artists' books.  My most popular books at this show were my Italian longstitch books made with leather and suede covers.  While some of the leather I use for these books is new, a lot of it is reclaimed.  My little red suede books are made from an upcycled pair of pants, and some of the other bits of leather came from a woman in Chicago who makes handmade shoes.  I'll be binding many more leather books up in the upcoming months to prepare for my holiday art shows and to sell at some local retail shops.  


Nashville bookbinder at Handmade & Bound


I still have a few of these Handmade & Bound buttons hanging around in my studio.  They're a welcome reminder of a fantastic weekend, and I can't wait until next year's festival. 

Handmade and Bound Nashville

Read more...

Guest post: Above the fold

>> Monday, October 3, 2011


Thanks to Katie's lessons and patience, hers were not the only books on display at the linenlaid&felt booth during the Handmade & Bound show at Watkins College this past weekend. Titled the "Husband's Corner," I showed off my newsprint books, bound in the Italian long-stitch style and featuring my favorite clippings from Sunday editions of The New York Times from 2010.


Before the show, I'd only made these books for myself and a few friends. I first got the idea when Katie made me a book from pages of Italian newspapers during her study abroad program. As a devoted reader of the Sunday edition, all these years later, I began to save page spreads.

The process for creating the books is pretty specific. In most cases, I repeatedly fold the news page in half, then tear it, and repeat until I arrive at the size seen here. This means that each sheet for the book is one-eighth of a page. Many articles and photos and spreads end up being torn into separate sheets, ultimately allowing me to juxtapose the clippings in interesting ways. On some occasions, when I didn't want to cut something in half, I would toss out the "system" and purposefully select a portion of a page to make one of my little sheets. As I answered one fair-goer on Saturday: Yes, the pages are carefully selected. Because of the style that I chose, there is a "center spread" in each signature. I put my best clippings there.

I assembled about 15 sheets per signature, and there are five signatures in each book. The covers are a cardstock that Katie and I both really like. I used simple brads and thread for enclosures.


I often found myself clipping sports and travel stories because of the amazing photography, infographics, and maps that come from those sections. Other favorites included an obituary on a tuba player, a feature on a bail bondsman for celebrities, all sorts of World Cup graphics, and a text-only movie poster for "Black Swan" ("WICKED, PYSCHO-SEXUAL THRILLER"). I tried to include all of the little things in the paper too, like the wedding announcements, the chess column, and corrections. I also selected pages with friends in mind, snagging particular baseball coaches and pop stars for their books.


At this point, I still have two books that haven't sold. But I've been saving the 2011 Sunday editions as well, and plan to bind those in the new year. I also have a special little collection of Supreme Court articles and graphics for a smaller book. And I've been thinking about some wide-format styles that could use the entire width of the broadsheet spread. A wide shape will allow me to show off the front page, as well as the six-column photos that often grace the section fronts. After all, I do call these books "Above the Fold," so I may be able to do a bit more justice to the big impact put out by the paper.

Read more...

Vacation photo on display

>> Wednesday, September 28, 2011

The newest addition to our new apartment in Nashville is this tropical flower canvas print.  I was contacted by the folks at Easy Canvas Prints, a photos to canvas company, who asked me to review their product in exchange for a canvas print of my own.

I chose a photograph I took at Hawaii Tropical Botanical Garden on a recent trip to Hilo, Hawaii for my best friend's wedding.  The botanical garden was truly a wonderland, filled with waterfalls, ocean views, an orchid garden, tropical birds, and so many varieties of plants that I'd never seen before.  I was snapping photos non-stop during my visit (you can see some of my other botanical photos in my flickr photostream) and I was looking for a way to display some of my favorites once returning from our trip.  This canvas print was just what I needed.  


Ordering a canvas from EasyCanvasPrints.com really is, as the name suggests, easy.  The website is simple to use, and it guides you through the step-by-step process of designing your own canvas.  And this handy guide shows all of the options and pricing so you can pick out exactly what you want.  

You can choose any sized canvas (mine is 8" x 10"), and you can either upload your own photograph like I did or you can choose an image from their gallery.  You also have the choice of upgrading to a thicker canvas or opting for photo retouching.  For the edges of the canvas, you can have your image wrap onto the edges or you can select a solid color for the border. 


I opted for a bright orange border for the edges of my canvas.  My print is displayed against lime green walls in my apartment, and I wanted it to tie into colors of the room but still pop against the wall color.  I debated the borders of my canvas for a while before placing my order.  I really like the look of the canvases where the images continues onto the edges, and I think I would probably choose that option next time, but for this particular print the bright orange border worked out best.

The option of wrapping the image around to the edges of the canvas would be best for a picture with a background that's not crucial to the composition.  If you choose this option, the photo will appear slightly larger on the front surface of the canvas so there's enough leftover to wrap.  I didn't think the composition of the tropical flower photo was quite as strong once the whole image wasn't visible on the main surface of the canvas.  The orange border worked out better in my case because I could better control the composition of my print, while adding an extra pop of color.

I do wish there was a better way to select the color for the edges though. It would be a nice touch if the website allowed the option to sample a color directly from your photograph, like you can with the eyedropper tool in Photoshop, rather than choosing a color and hoping it matches.


My husband and I have a fairly extensive art collection (including artwork made by friends, family, and ourselves, as well as original work by professional artists, and a collection of vintage photographs), and we're pretty particular about what we put on our walls.  If we don't love it, there's just not space for it.  That said, we were happy to include this canvas print into our home decor.

And another perk of this canvas is how easy it is to hang on the wall. One nail will do the trick.  My husband and I have lived in four apartments since college, and we've hung our artwork on the walls of each one.  This is by far one of the easiest pieces to hang.

Overall, the vibrant colors and high-quality printing makes it evident that this is a high quality product.  I love having a reminder of our trip to Hawaii on display for me to see each day.  The look of our particular print is contemporary and casual, which is exactly what we wanted for our vacation photo.  But I think these prints could be a great choice for displaying wedding photos too, especially a larger canvas print placed in an elegant frame.  If only I'd known about these two years ago!

Read more...

Handmade & Bound

>> Tuesday, September 27, 2011

Handmade & Bound Nashville logo
The first annual Handmade & Bound book arts festival is just a few days away!  I've been looking forward to this event for months.  It was one of the first things about Nashville I found out about once we knew we'd be moving to town, and I sent in my vendor application before we'd even started packing to leave Virginia. 


I thrilled to be living in a city with a book arts community, and I can't wait to be a part of this event.  In addition to the various vendors selling handmade books and zines, there will be workshops and demos in bookmaking, papermaking, and printmaking, as well as a film screening, a gallery exhibit, live music and food trucks.  


Handmade & Bound Nashville
September 30 and October 1

Friday, September 30

6:30 pm: Opening reception of "Encoded Structures: Interpreting the Story," a juried gallery show of artists' books and zines

8:00 pm: Free Screening of “$100 and a T-shirt," an award-winning documentary on the culture of zine making

Saturday, October 1

Vendors:

10:00 am – 5:00 pm: Vendor booths exhibiting and selling artists’ books, zines, small press publications, and other handmade bookish things.

Demonstrations:

10:00 am – 5:00 pm: Goldsmith Press Demonstration; print your own DIY bag

10:00 am – 11:00 am and 3:00 pm – 4:00 pm: Brown Dog Bindery Demonstration; Jennifer Knowles-McQuistion will demonstrate how wooden books are carved, burned, and bound

10:00 am – 5:00 pm: Gilded Leaf Bindery Demonstration; book restoration, fine bindings, blank journals, and gold tooling

10:00 am – 5:00 pm: Pamphlet Stitch Books for Kids with local printmaker and book artist Lesley Patterson-Marx

Workshops:

10:00 am to 11:00 am: Pixels, Print and Presence: How to Make the Most of Digital When It Comes to Print
This workshop is an introduction to web and digital assets for anyone from a DIY Zinester to Small Press publishers. 

10:00 am – 11:00 am: Findings & Bindings 
Use a discarded book, found papers both old and new, and a simple no-sew binding technique to create a one-of-a-kind handmade journal to house your creative notions.

11:00 am – 12:00pm: Zines with Kids & Teens

11:00 am – 12:00pm: Storytime for Children
Children can make paper finger puppets of the characters to take home.

12:30 pm – 1:30 pm: Miniature Accordion Popup Books
Artist Jennifer Knowles-McQuistion will lead participants through making a miniature hardback accordion book with pages that pop up, spill out, and burst from the folds. 

12:30 pm – 1:30 pm: Toward A Self-Sufficient, Long-Lived Zine
Examine the nuts and bolts of what it takes to keep a serial zine alive and vital. 

1:30 pm – 2:30 pm: Felt Sketchbook
Participants will design their book covers using felt and other materials, such as decorative papers, threads, and beads. Then they will assemble their sketchbooks, binding the books using posts and screws.

2:00 pm – 3:00 pm: The Art of Saying Something Worth Saving
Discussion will cover the pressure language undergoes when we seek to present it in a book arts project, and how words respond and rise to that challenge or collapse under the weight of that attention, and how we recognize it. 

3:00 pm – 4:00 pm: Quadraflip or infinity card
Turning the pages of this structure changes their orientation and reveals hidden pages before taking you back to the beginning. 

3:30 pm – 4:30 pm: Open Mic Zine Readings

All day: Papermaking 
Book artist and instructor Annie Herlocker will guide you through pulling your own sheet of paper from pre-pulped materials.

Read more...

Made with love for my dad

>> Thursday, September 15, 2011


Today is my dad's birthday, so it seems like as good a time as any to share some more details about the photo album that I gave him for Christmas.  

My dad started to get interested in photography back when I was in high school taking some photography classes.  I taught him some of the basics, and he started incorporating the rule of thirds into almost all of his pictures (including lots of off-centered pictures of me at graduation).  But since then, he has become a really talented photographer with a great eye for capturing unusual sites around the historic city of Charleston, South Carolina.


Each time I would come to visit, my dad would pull out his camera and to show me his latest pictures.  I'd flip through one by one admiring his work on the tiny camera display screen and wonder why he never made prints of any of his photos.  Showing them off in this way just didn't do the pictures justice, so I decided that he needed a better way to display them.


After I gave him the book, my husband and I helped my dad pick out all of his favorite photos and we added them to the book with photo corners. He's taken some great photos like the one above where he chose to photograph the back of a statue, or some complex reflected images inspired by my photos of store window reflections.  I'm glad that he now has a proper way to display his pictures, and I'm sure he'll soon be ready for a companion album to store his newest shots. 

Read more...

Making paper by hand

>> Saturday, September 3, 2011


I've been taking over the house once again with my latest creative project -- papermaking.  (Thankfully my husband doesn't seem to mind, and he even stepped in to take some photos of the process so I could share them here.)  

I met a local bookmaker, Laura, here in Nashville soon after moving to town.  We then met up for coffee to chat about books and new techniques we wanted to try.  We decided that papermaking should be our first project and we wasted no time with getting started.  We made these lovely lavender sheets of paper last week, and we've since made a new batch of raspberry-sherbet-colored paper and have several bags of paper pulp in my fridge prepared for our next papermaking adventure.  

The bowl above is filled with little torn-up scraps of paper leftover from making books.  For about a week, I collected all of the little bits of paper that were too small to be reused.  Then I soaked them in water for about 12 hours.  Then Laura and I blended the paper scraps into pulp using her smoothie maker that she donated to the papermaking cause ("the sacrificial blender," as my husband called it).  


Unfortunately, I didn't get any pictures of the blended paper pulp this time.  You might expect it to look like a gross and gooey mess.  But it's surprisingly soft and has a really luxurious feel to it.  It's actually quite nice to dip your hands into it during the process.  

Next, we added our pulp to a large vat of water.  Then we'd dip our mould and deckle (made by Laura!) into the vat to pull a sheet of paper.  With each sheet I pulled, I loved seeing the assortment of speckles and flecks of paper that happened to make it onto the mould because they remind me of the books I'd made with those different decorative papers.  


After pulling the sheets, we'd press them from the mould onto pieces of cloth, and eventually set them out to dry in my living room.  (It's been much too humid to dry them outside.)  It took about a day for the sheets to dry completely.  Once dry, Laura and I got together again to gently peel our sheets of paper off of the cloths.  


And here's the end result:


We experimented with using different types of cloth to press our wet sheets of paper on to dry.  The textures of the cloth effects the final texture of the paper.  You can see an examples of the different textures below.  We used linen, felt, and cotton to achieve different textures.  The sheet on the left was pressed onto felt; the sheet in the center was pressed onto linen, and the sheet on the right was pressed to a wrinkly piece of cotton.  We also experimented by rolling wet sheets of paper onto plexiglass, which yielded an incredibly smooth texture. 

I love textured paper.  In fact, such textures are the namesake of my business: linenlaid&felt.  (You can read more about that in the FAQ section of my website.)  While commercially-made papers of these names are made to resemble the textures of these cloths, making paper by hand allowed for us to create these textures ourselves.  Laid paper refers to the lines impressed by certain types of papermaking molds, like those that I used in Italy.  


Both Laura and I have already put our new sheets of handmade paper to use.  I made two Italian longstitch journals last week with suede covers and pieces of our handmade paper as decorative accents inside.  It has been a while since I've made a book for myself.  I'm typically busy working on custom orders, books for my shop, or gifts for friends, so I decided to take the time to make a book just for me. 


The book on top is the one I've decided to keep.  Because these books have the suede straps that wrap the book and keep it shut, it will be the perfect portable book to keep with me to jot down notes on the go.  And as an added bonus, I'll always have an example of my work with me to show as a response to the blank stares I often get when I tell people that I'm a bookbinder.  The other book that I made (the one bound with lavender thread) is now for sale in my etsy shop.  


Laura kindly made a monogrammed bookmark for me using the paper that we made together.  She makes the most adorable miniature books and book jewelry, and she will also be selling her work at the Handmade & Bound festival in a few weeks.  I love seeing the little purple pages peeking out from the little book and knowing that our handmade paper is going to good use.  


Read more...

  © Blogger templates Shiny by Ourblogtemplates.com 2008

Back to TOP